
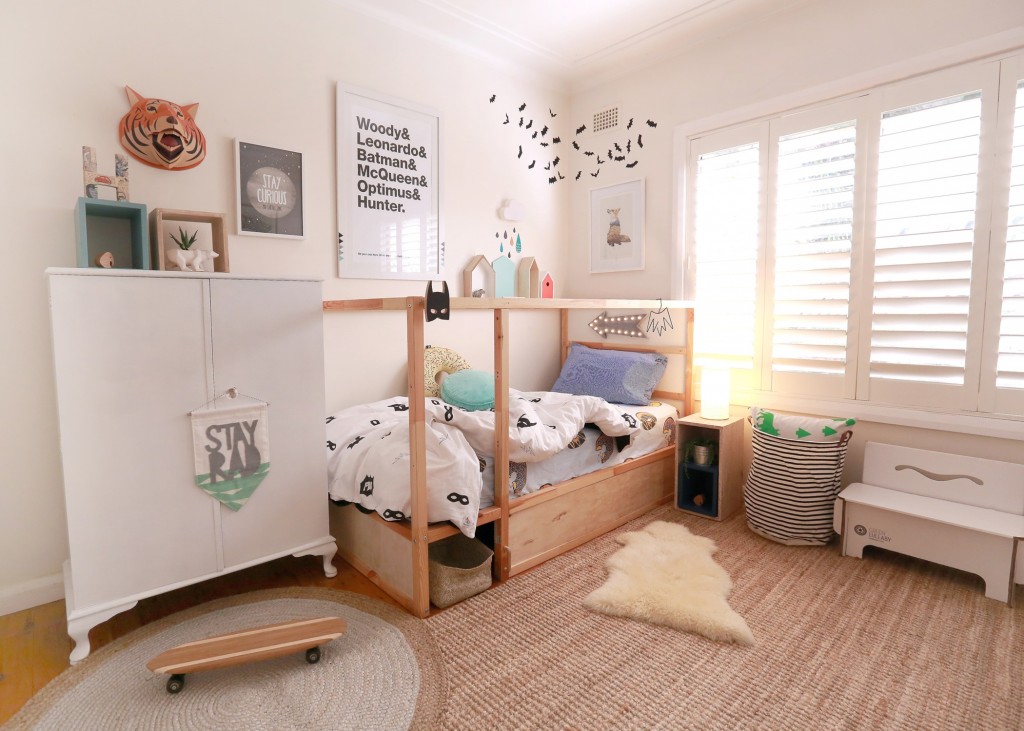
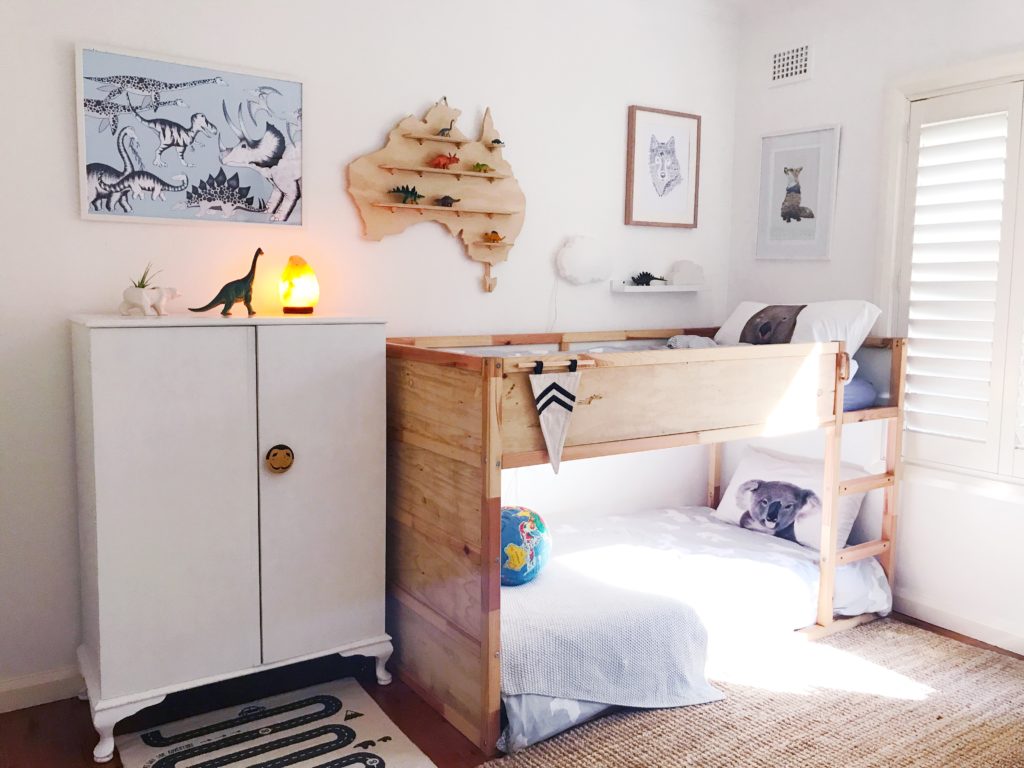
My most shared image and frequently asked question on social media is without doubt about my IKEA KURA hack.
Many years ago we purchased the IKEA KURA bunk bed for my son’s room.
I love the fact that there is a low bed on the bottom, perfect for the transition from cot to toddler. I love that it is reversible so that you can have a cool single bed with house-type structure for canopies and hanging things; or sleep an older child on the top with a nook below for storage, study or den.
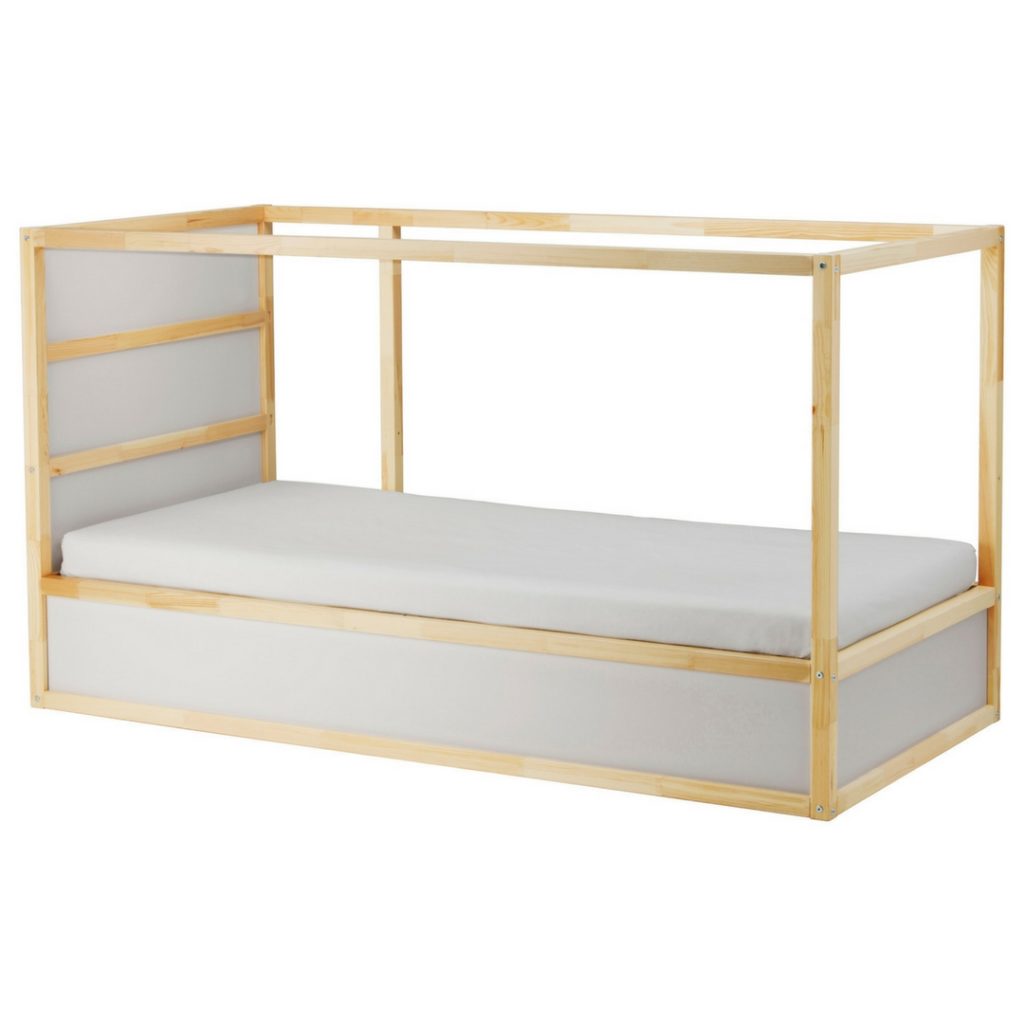
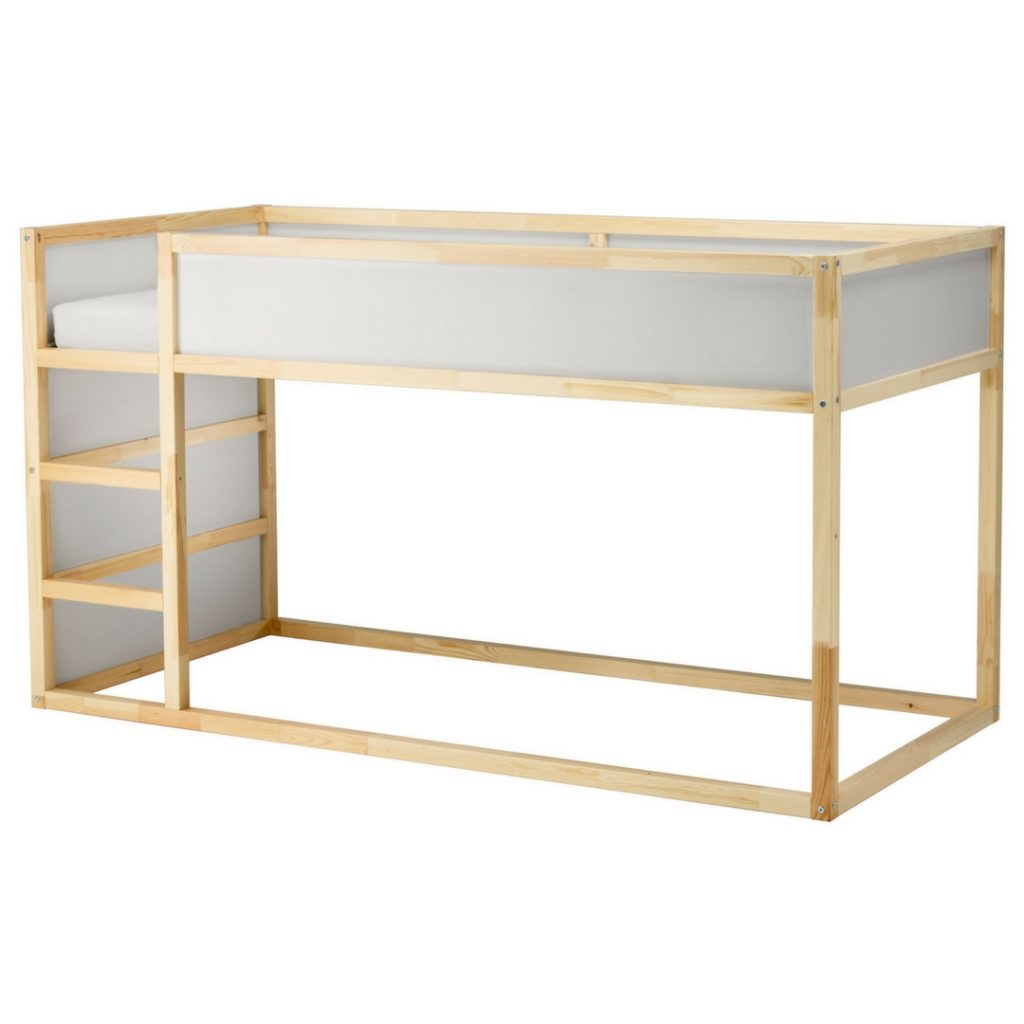
At AUD $299 it is also a great budget option, but I was never very happy with the bright blue panels (now sold in white) and was keen to update it with a more natural, Scandi look.
Easy IKEA KURA Hack – Get The Look
No DIY experience necessary!
I measured the size of the panels and headed off to Bunnings (or try any good hardware store) and found some plywood (approx 5mm thick)
They don’t usually cut small sizes but I must have looked a bit lost / daunted and someone took pity on me. Good old Bunnings!
Approximate dimensions (Please double check these on your bed, to be certain)
Minimum 5 x panels; Maximum 7 x panels depending on how you display the bed.
- Panel 1 (shorter side, with ladder as in my images) 1500 x 235 mm
- Panel 2 (longer side, not shown in my images and only required if visible) 1900 x 235 mm
- End panels (x4 if visible from only one end as in my images; x5 if both ends visible or you intend to swap it around) 915 x 235 mm
What’s Next…
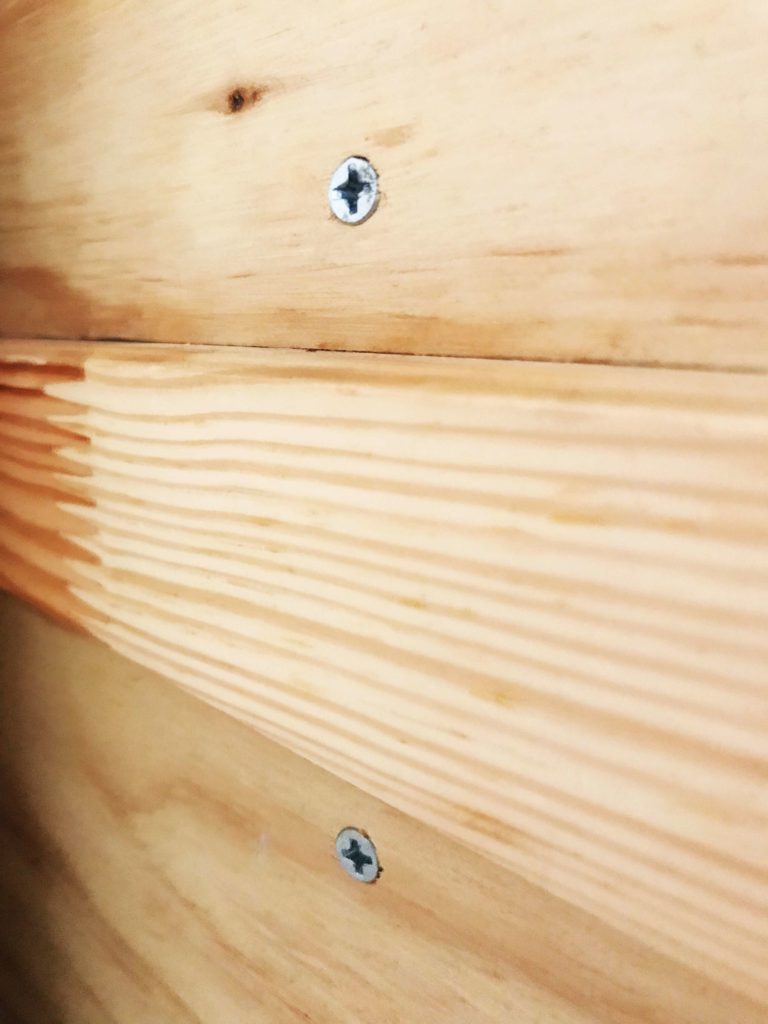
Simply screw the ply onto the panels and that’s it! I used Phillips head countersunk screws that are 15mm long so they don’t go through to the other side and sit flush with the ply.
As requested, here is an image to show what the screws look like once in.
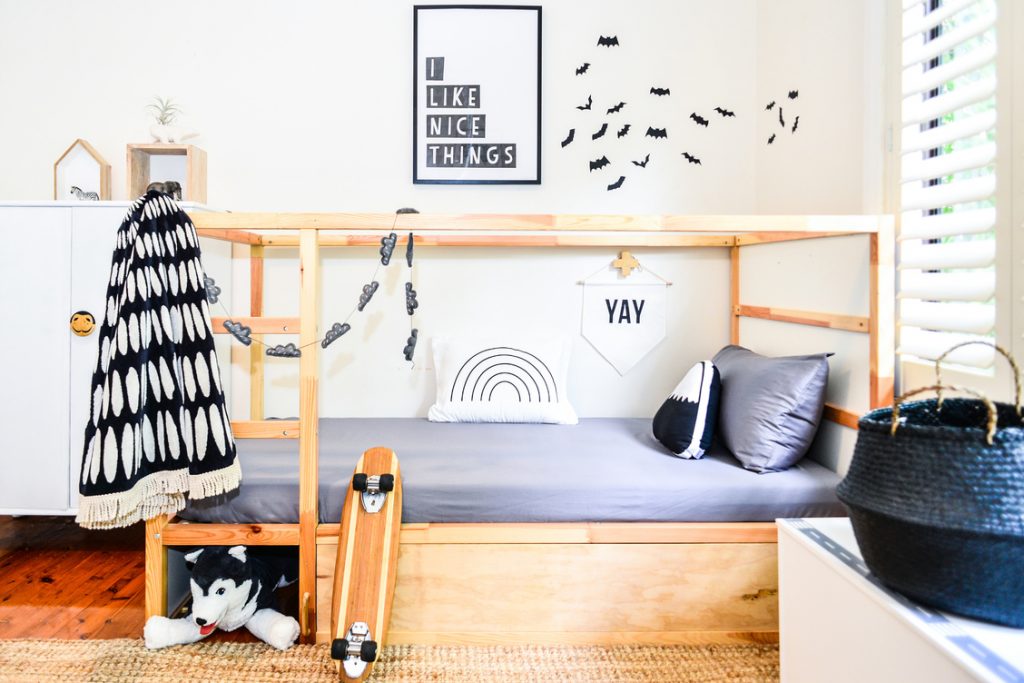
Completely transformed it is such a simple, cost-effective project to get a Scandi look for your kids room.
Do share photos if you try this, I would love to see the look you create!
Products In Main Image
- Upcycled vintage wardrobe by me. You can custom order here (Sydney only)
- Australian map shelf – My Treasure Board by One Two Tree.
- Dinosaur print – Triceratops & His Friends by Dino Raw.
- Night light – Himalayan salt lamp (large) from Hearts Desire Homewares.
- Wombat and koala pillowcases by For Me By Dee, purchased from Concreate.
- Flag (on bed) by Pony Rider.
- Custom name wolf print by Happy Ella After.
- Organic cotton charcoal sheets (just visible on top bunk) by Moonlit Sleep.
Hello! I love this look, thank you for the idea. I was curious if you had stained the original frame. TIA!
Thanks Allie! Thanks for getting in touch – I didn’t stain the frame but it is quite a few years old so they may have changed the model a bit if you’re looking at a new one.
Hi! How did you place your slats for the bottom bunk! We are wanting to do a bed like this for our triplets but don’t want to place a mattress on the floor for the bottom bed!
Hi Lauren – ah yes! Good question. I didn’t want to place it on the floor either so I used the sides of the old cot to lift it off the floor! I wonder if you could look on eBay or Gumtree for a second-hand bed and just use the slats? Triplets… You’re amazing x
Pingback: 20 IKEA Kura Bed Hacks For A Unique Look
Hi there, sorry to be a bit dense but did you screw the ply to the fibreboard panels or to the pine frame? Thank you so much – going to attempt my first DIY!
Hi Clare, oh that’s exciting! No dense questions here, it’s all good! You screw the ply straight into the panels which in my case were blue as this one is an old model. Now I think the panels are white. I added a pic to the bottom of the post showing the screw, because they are short they don’t go through to the other side but are long enough to work (mine have stayed put for years) Hope that helps. Please send pics I would LOVE to see!
Do you think that wood glue would work on gluing the plywood to the panels?
Hello, yes I think it probably will – great idea!
Hi Catherine,
Where do you get the writing wall art with character names near the bed?
Thanks
Tori
Hi Tori, isn’t it fab! It’s from Meenyminy https://meenyminy.com.au/
Hello Catherine,
This is just so beautiful you are such a talent! quick question went on to your instagram and i couldn’t see it so hopefully you can help me out – did you ever post a close up of the screws? Thanks
Lu
Thank you Lu! I have added an image to the post so that you can see what I mean. Hope that helps 🙂
What kind of mattresses did you use? We have the same bed and I am struggling to find ones that are not super thick.
Hi Betsy – I use an IKEA mattress on the top bunk as it is has a lower profile. And then a standard thicker mattress on the bottom. I recommend the IKEA mattresses.
Did you apply a clear coat to the wood or a light stain? The woods looks different from the stock pine that comes with the ikea bed.
Hi David, the IKEA KURA here is straight out of the box, no stain or anything. It was bought about 6 years ago so possibly is a little different now? I know the panels were blue when I bought it and are now white, so there could be other differences. Best to check at IKEA I think. Many thanks
Hello,
did you stain or clear coat the wood or left it the natural rough finish you get out of the box?
Hi Dave, do you mean the IKEA bed or the ply panels? The KURA is straight out of the box (bear in mind I bought this one about 6 years ago so it may be a little different now?) The ply is also natural, no stain
Hi, looks great! Are the screws very visable? Also where did you position them to make the panel secure enough. Thanks! Brielle
Ah good questions! I used countersunk screws so personally I don’t think are very visible (i.e. they don’t bother me aesthetically) I will take a photo and pop it on Instagram if that helps? (@tubu.kids) I position one at each corner and then an extra one top and bottom of the centre. It’s then nice and secure (it copes with little boys climbing all over it!)
What type of wood did you use?
Hi Colleen I used plywood sheets which you can get from most hardware stores
Hi lovely
Where would I find the Australian wooden map? Thank you in advance!!
Hello Iara, it’s from One Two Tree – isn’t it wonderful! 🙂 (search for Treasure Board on their site and there is a link above in the feature)
Did you use a finish on the wood? Thanks! Also what stresses are these
Hi Jeannie – no finish on the wood, literally just cut and fixed to the bed 🙂 Sorry I don’t know what you mean by stresses… Let me know and I’ll do my best to answer. Thank you!
Hello Catherine, there are so many hacks of the IKEA Kura bed, but is the one I like most! It looks amazing.
I am not an experienced diy person and hoped you could help me regarding the screws? How long were they and what happend on the inside of the bed? You must have covered them somehow so the kids not get hurt or do they not go through?
Thank you so much for helping!
Thank you that’s so lovely! Ah, a good question… I used Phillips head screws which are 15mm long. They are so small they don’t go through to the other side of the bed (but are enough to secure the ply), and as they are countersunk ones they sit flush against the wood. Thank you for asking, I will add this info above 🙂
Did you add plywood to the bottom for the lower bed ? I love the idea of a lower version of a bunk bed.
Hi Tabitha! My apologies for not responding sooner. The lower bed (i.e. the part with the mattress directly on the floor) didn’t have plywood added – only the bigger sections. Most images show it with the plywood on the top and sides; or if you flip it over to a single bed then the main plywood panel is nearer the floor. Many thanks for your question! Catherine