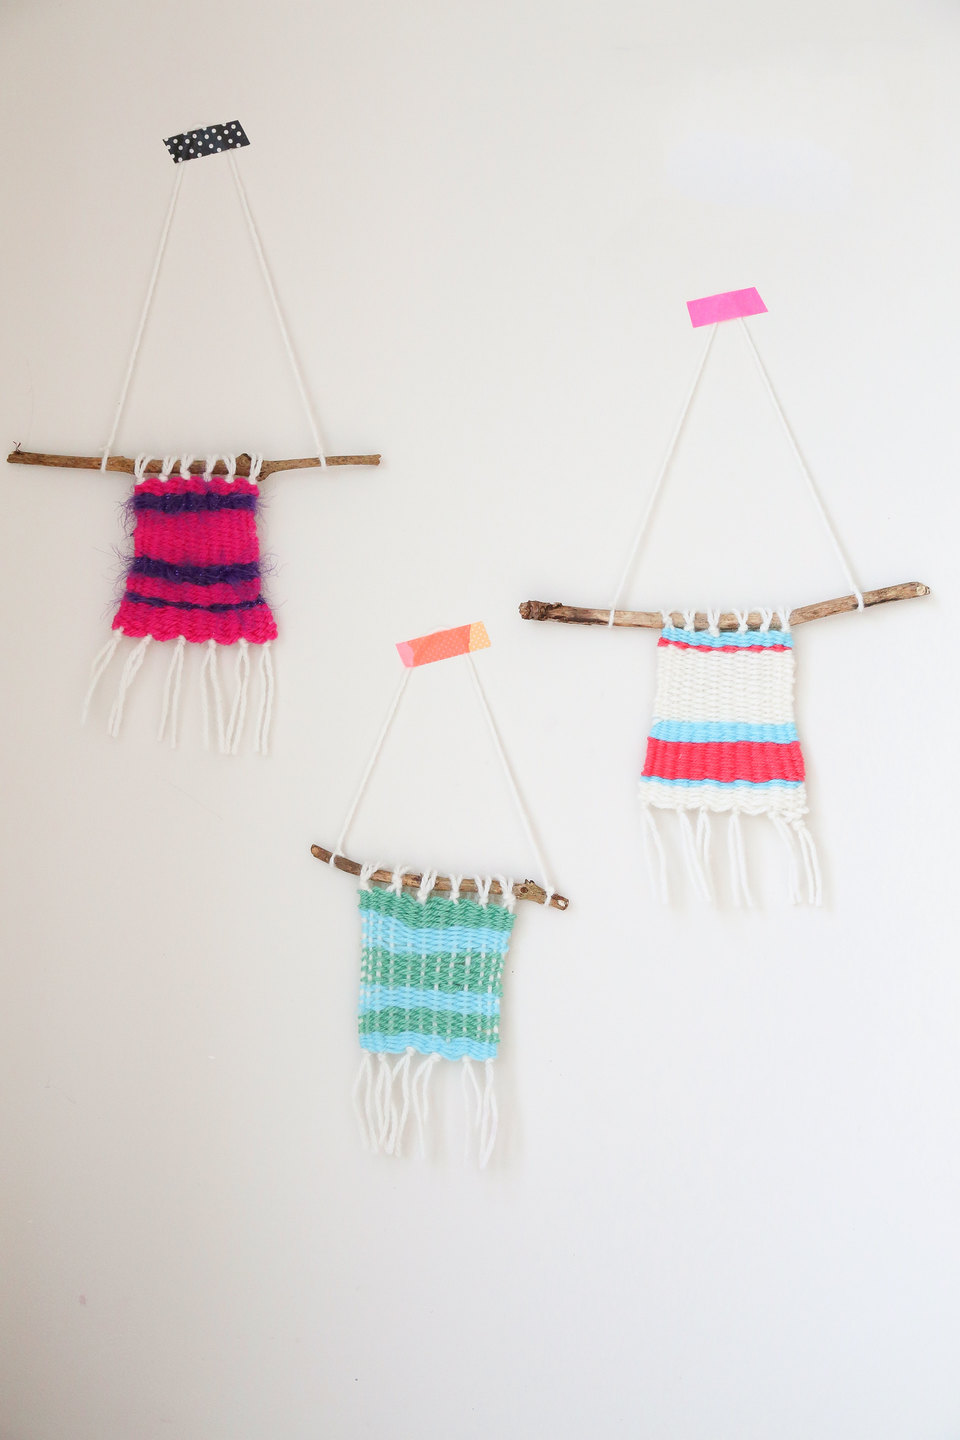
A handmade wall weave, made by kids!
This is a fun and easy project to do with the children – perfect for a rainy day or when you’re at a loose end.
The looms are super easy to make and can be used again and again.
The children loved choosing the yarn and helping to make their looms. The weaves now beautifully adorn their bedroom walls and are a lovely reminder of the little project we did together!
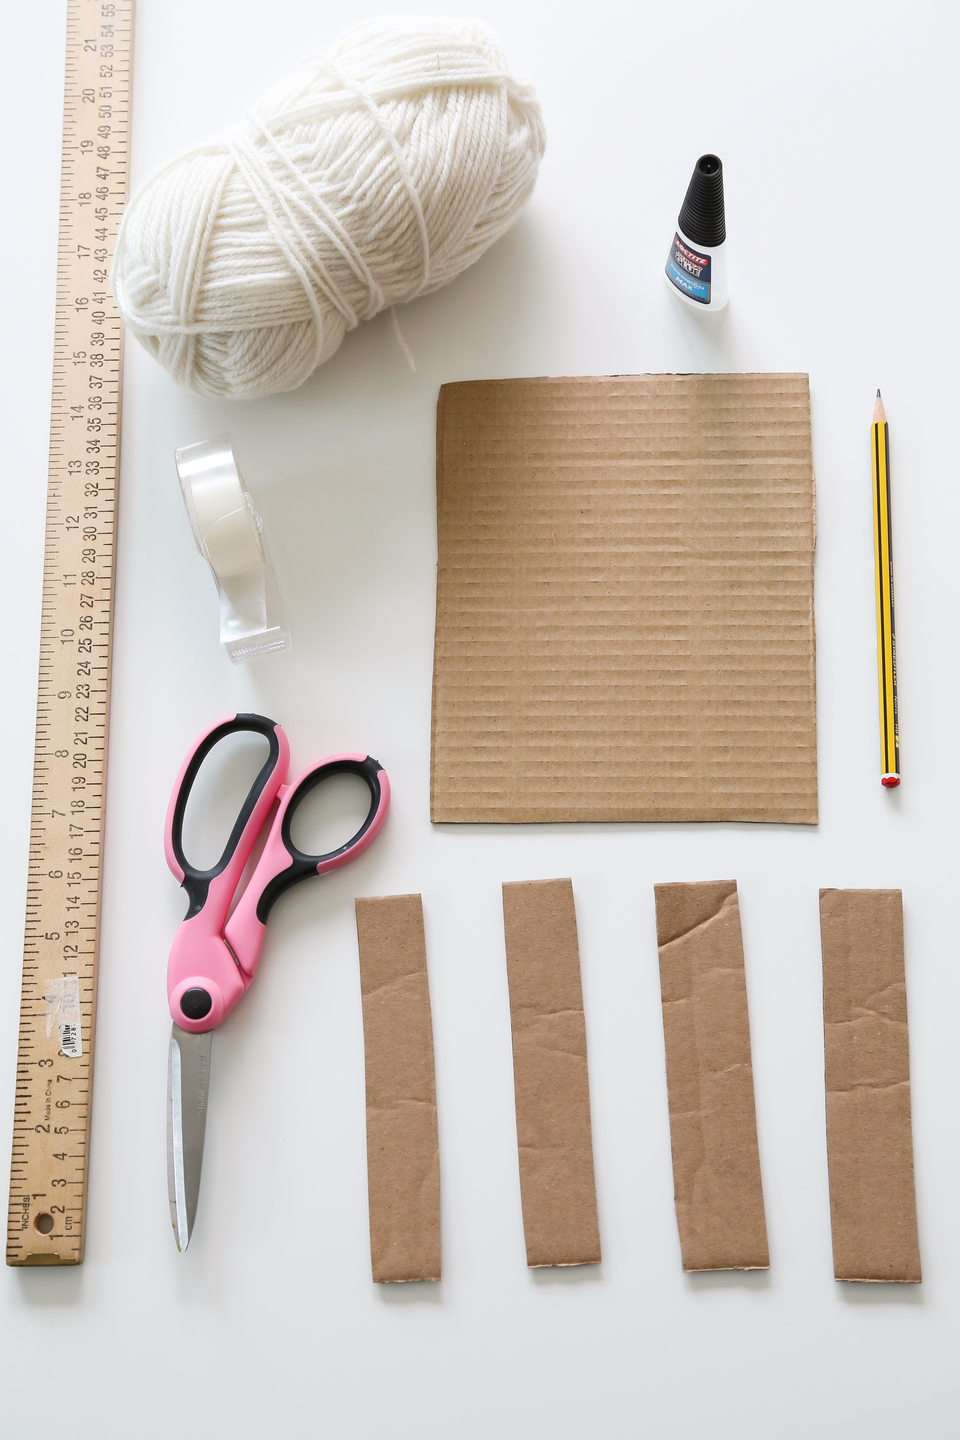
CRAFT SHOPPING LIST
For the cardboard loom you will need:
- Cardboard
- One board 15 cm x 20 cm
- Four strips 1.5 cm depth x 15 cm long
- Scissors
- Ruler
- Pencil
- Glue
- Yarn
- Tapestry needle
- You will also need wool for the actual weave (see below)
 What you will need…
10 Steps to Make the Loom
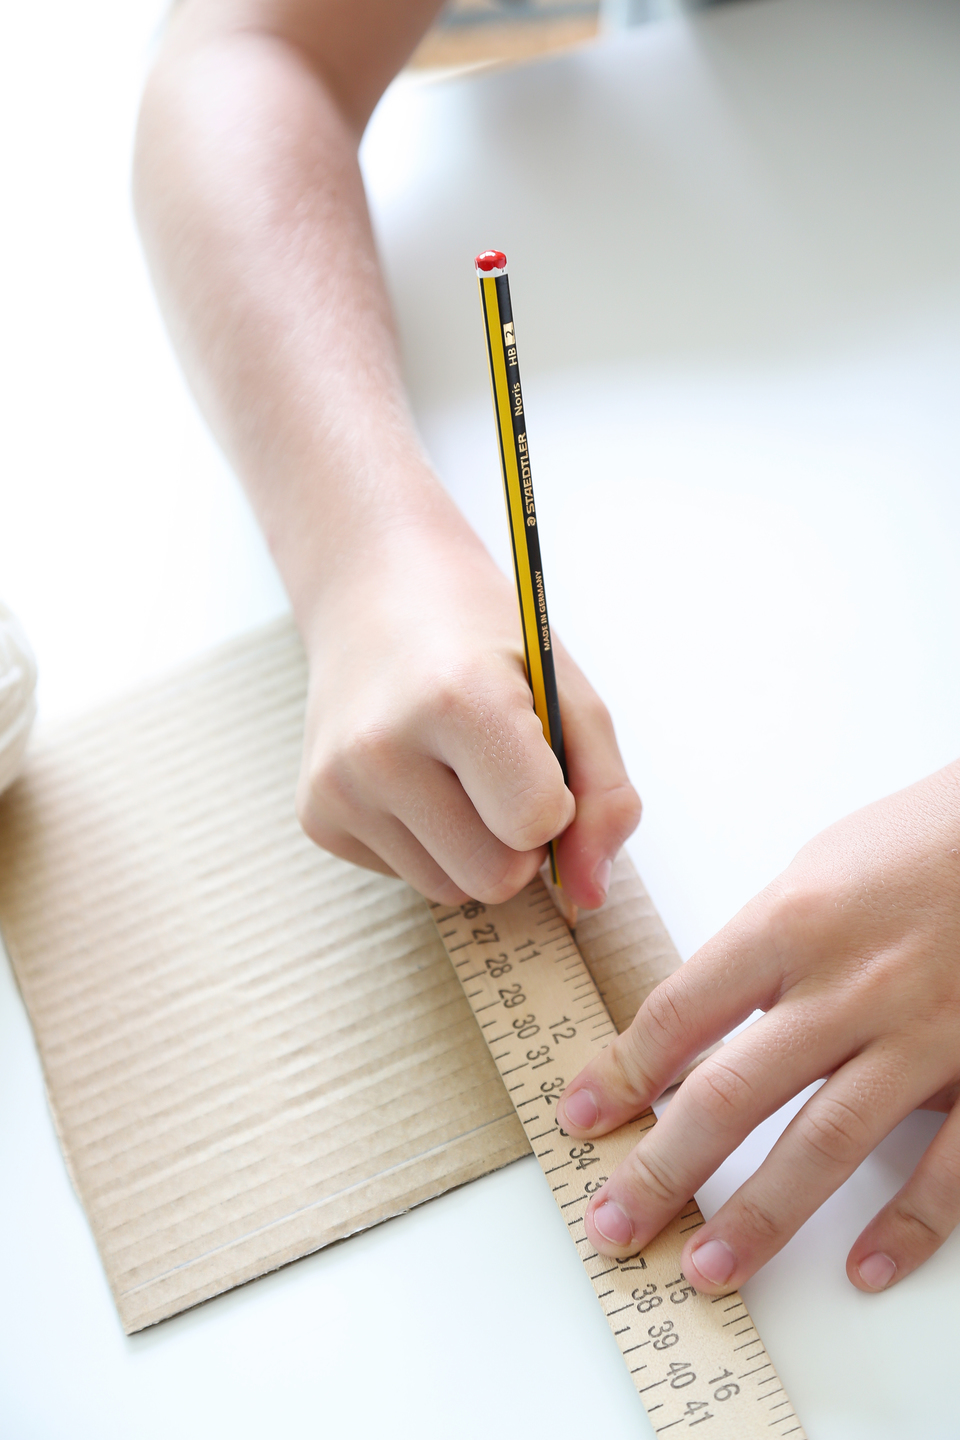
1. Cut the cardboard to the sizes above
2. Take a ruler and place across the top of the 15 x 20 cardboard. Measure 1 cm down from the top of the cardboard and draw a straight line across.
3. Measure 2.5 cm in from the left side and draw a straight line down from the top to the bottom of the cardboard. Repeat on the other side marking out the same, 2.5 cm in from the side.
4. Go back to the first line you drew (1 cm from the top), and now starting at the vertical line (2.5 cm in from the left), make a mark every 1 cm along the horizontal until you reach the other vertical line (2.5 cm from the right edge).
5. Repeat this for the lower horizontal line too.
 3. Marking 25 cm each side
6. Use a craft knife or sharp scissors to cut down from the edge to each of these 1 cm marks (stopping at the 1 cm line) including down each of the vertical lines 2.5 cm from each edge. You should have 12 lines cut at the top.
7. Repeat for the lower edge too.
8. Take 2 of the strips of cardboard and glue together one on top of the other so they are double thickness. Repeat with the other two.
9. Glue them onto the large board so they are aligned inside the horizontal lines 1 cm from the top and bottom of the board. This side of the board is the front.
10. Next prepare the yarn for your warp*. Cut 12 lengths of yarn leaving around 30 cm each in length. Tuck/pull each piece of yarn through each notch and firmly tape down the loose ends (which should both be at the back of the board). Once each piece of yarn is secure you have your warp.
*What is a warp? This is the set of lengthwise yarns that are held in tension on the loom.
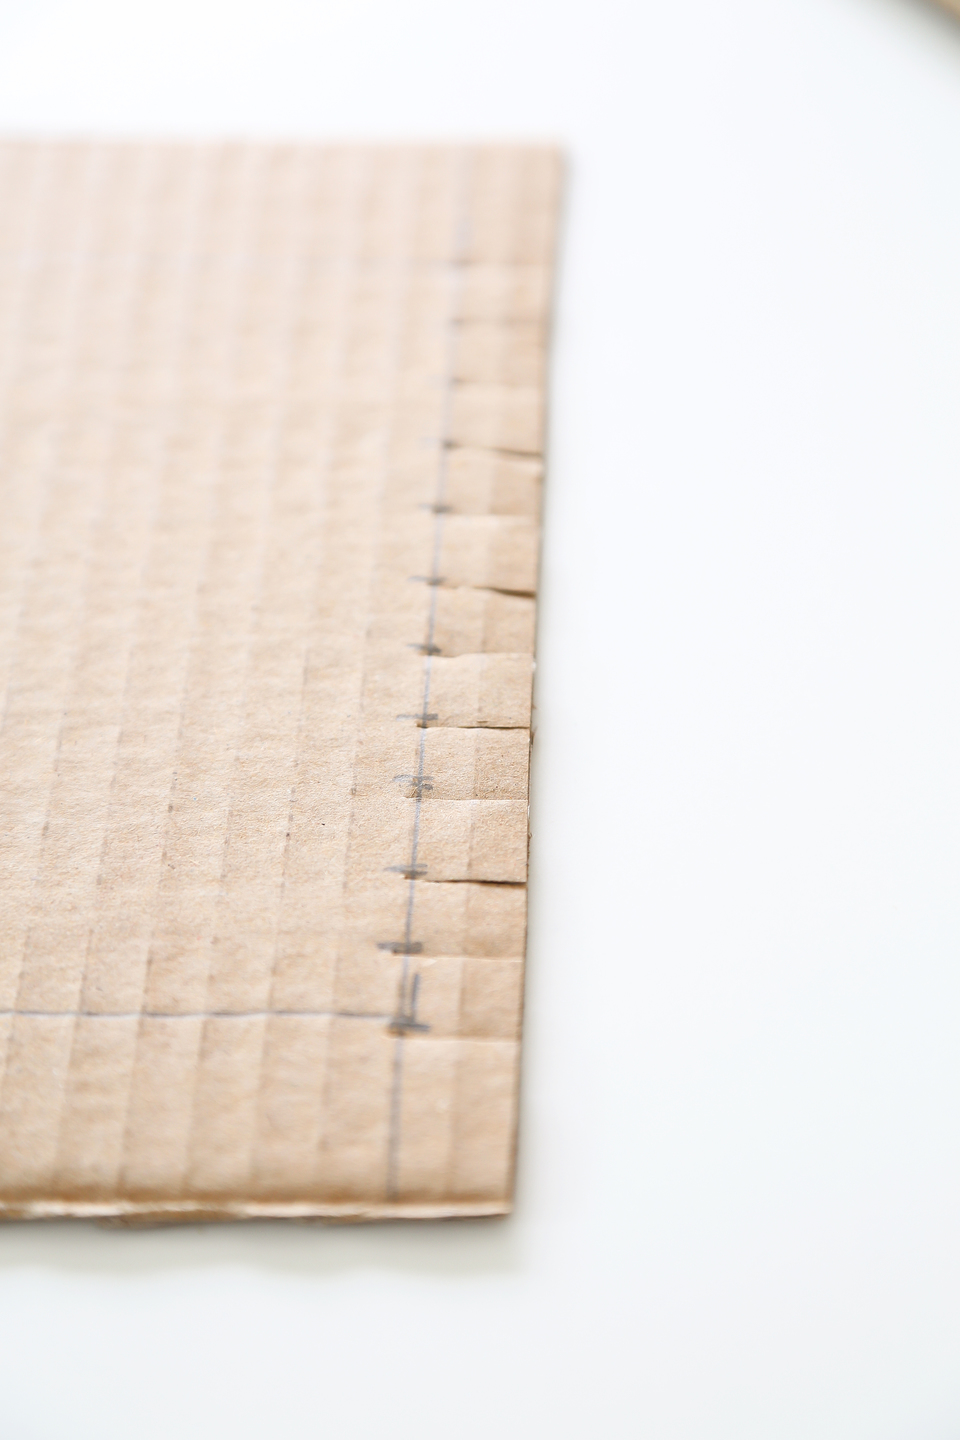 6. Making the 12 cuts
 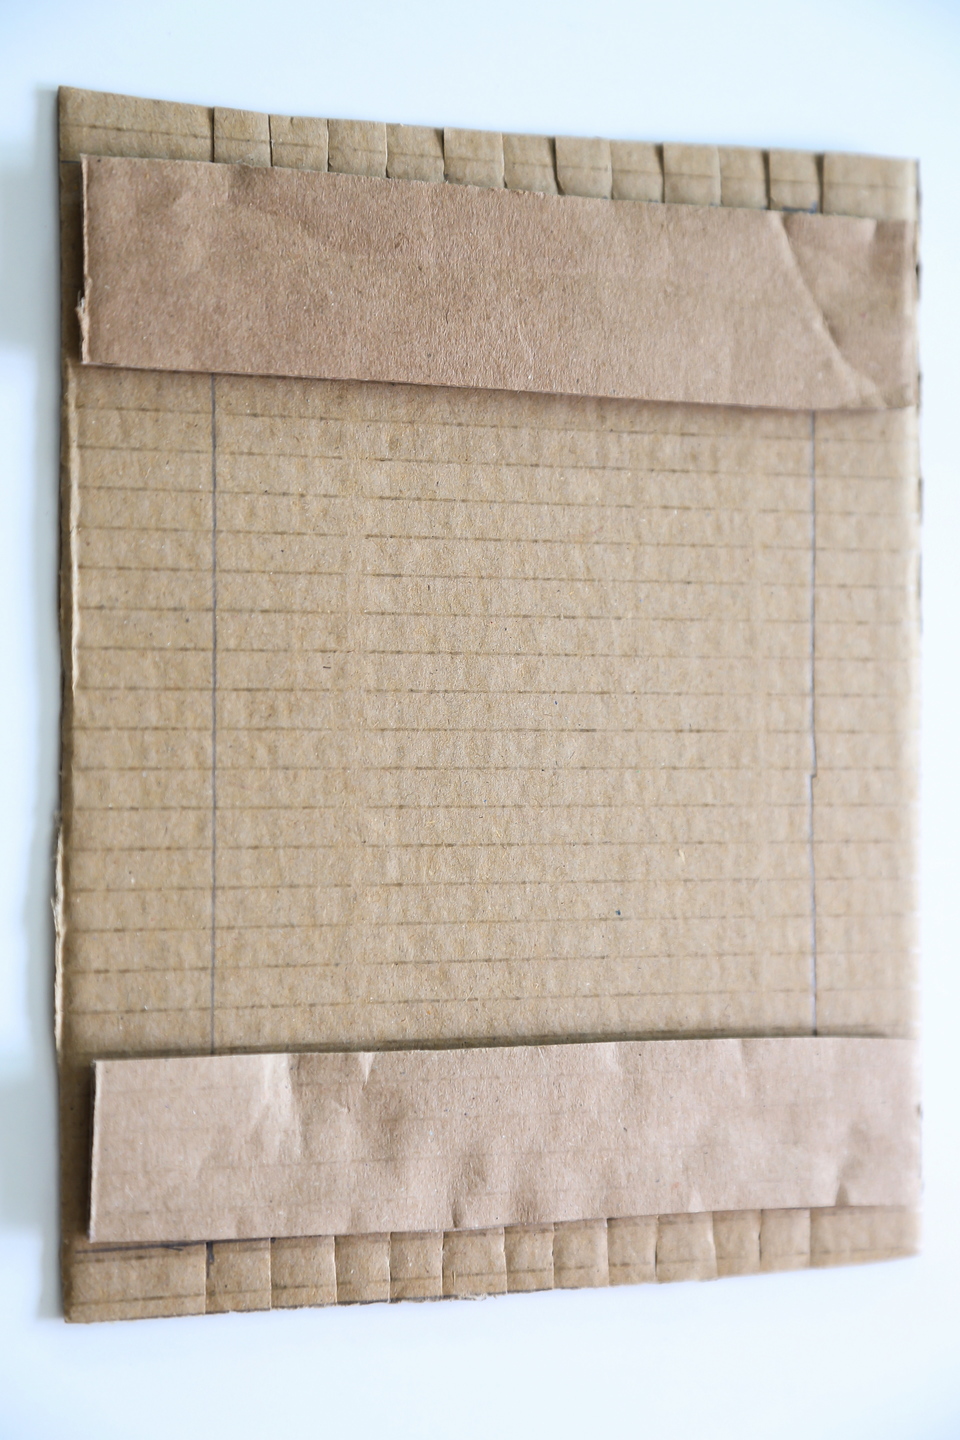 7. Double strips of cardboard added
  9. Tuck each yarn & secure at the back
 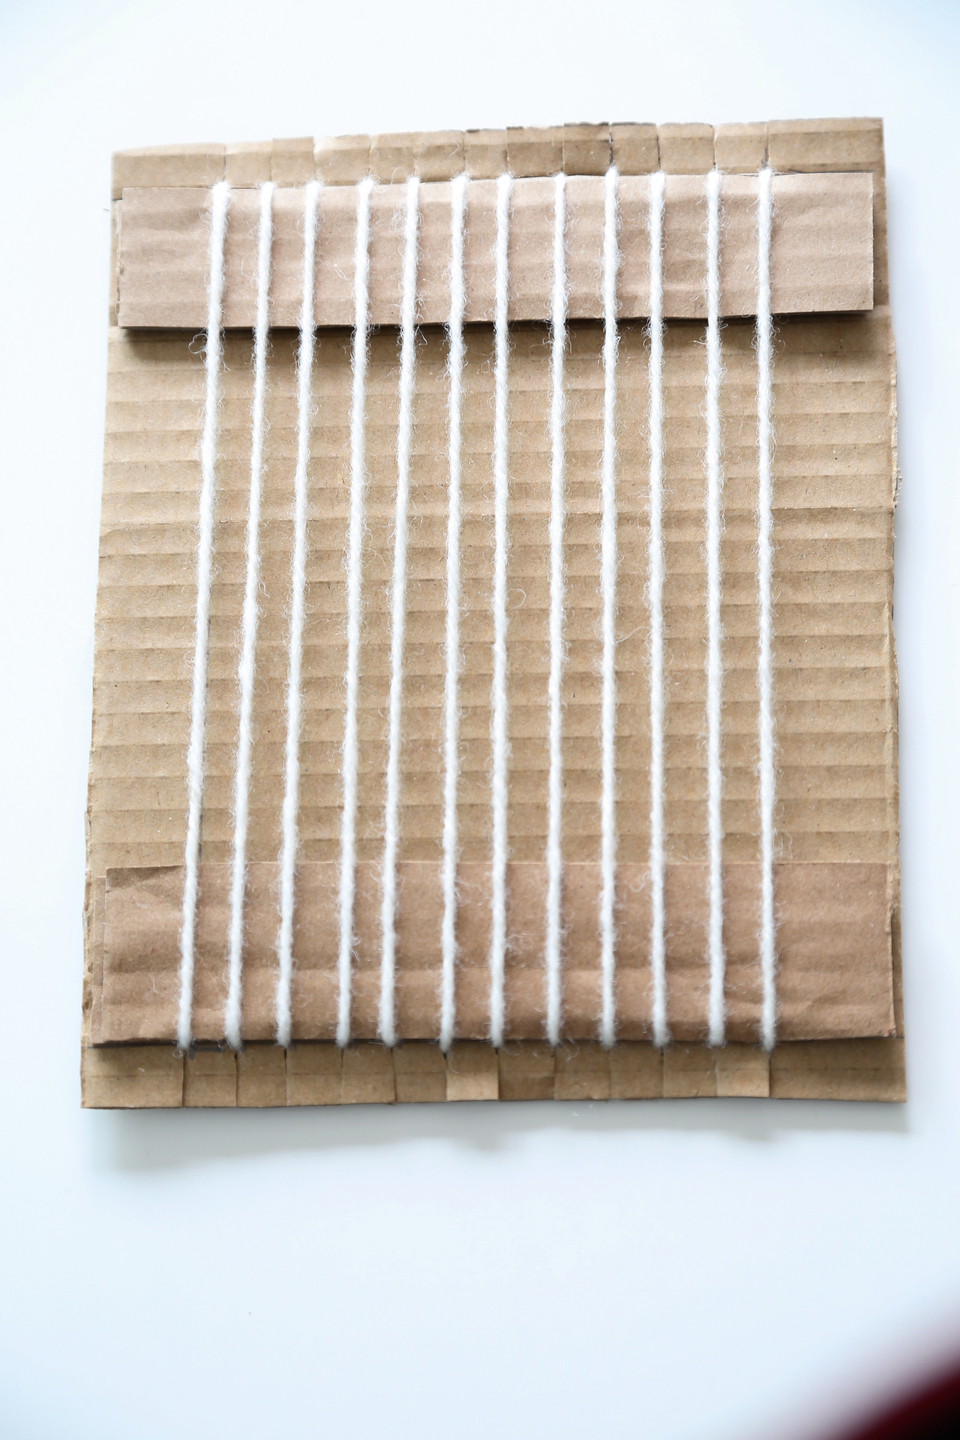 All 12 warp threads on
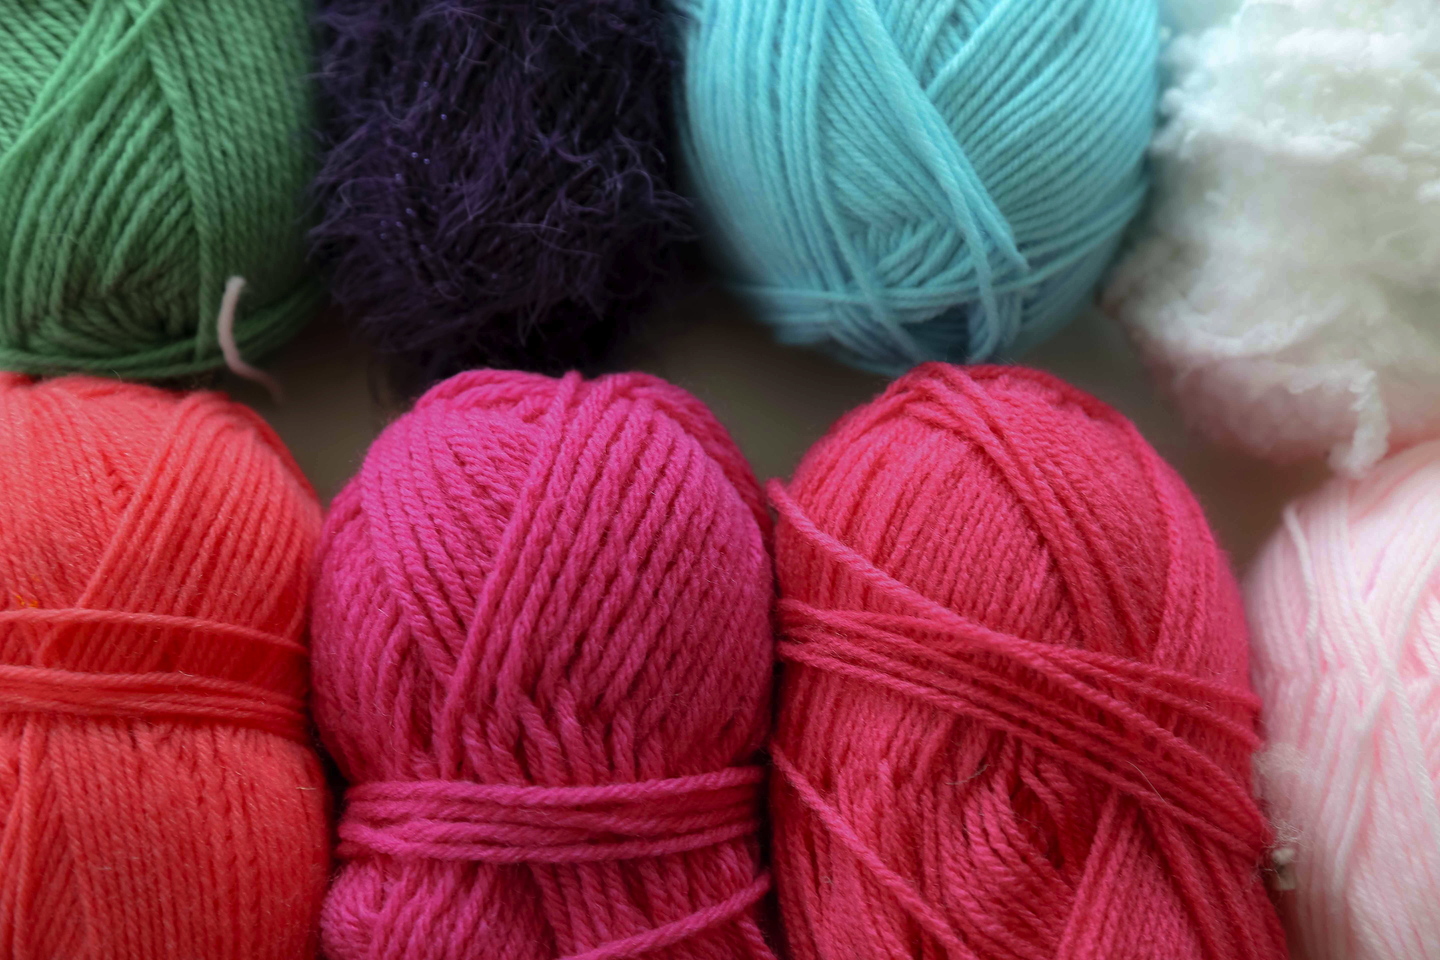
6 Steps to Make the Weave
We visited the wool shop and the children chose their favourite colours. There are so many different textures and colours to chose from!
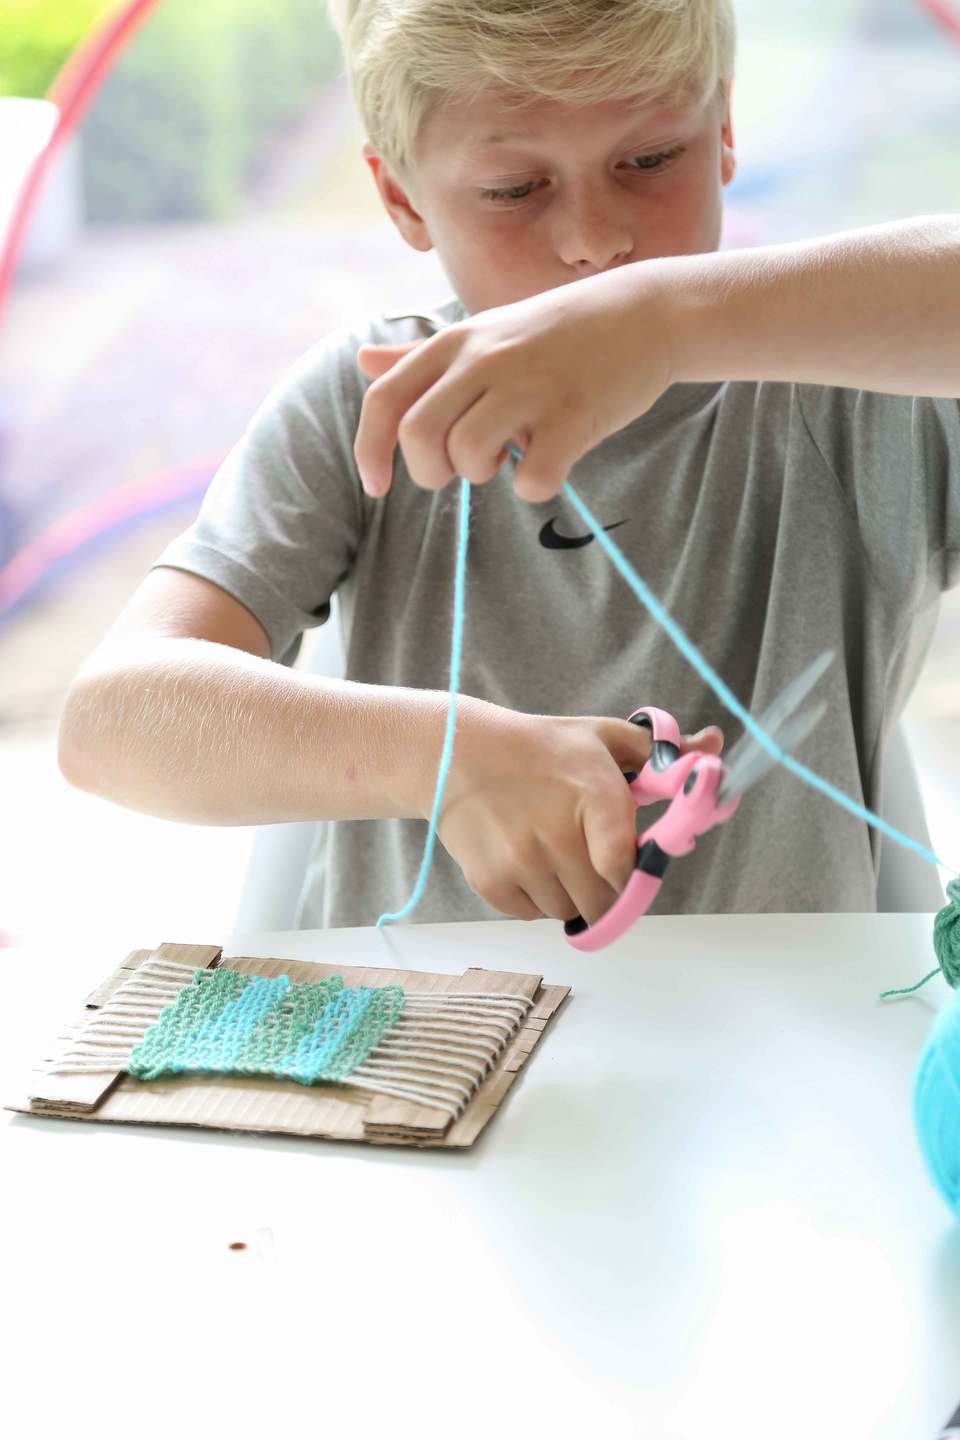
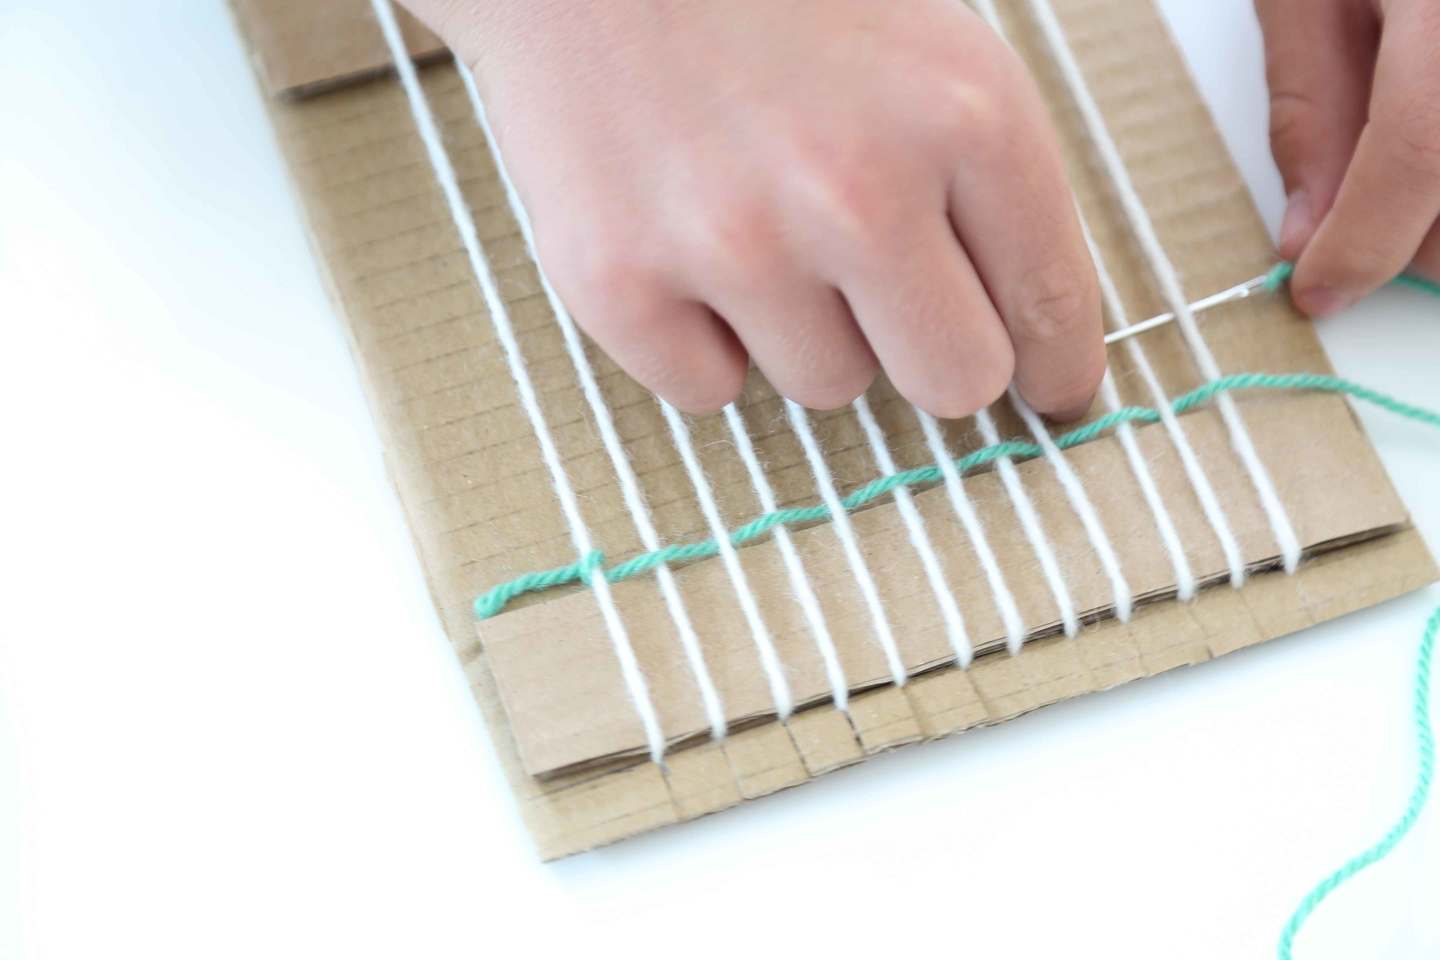
1. Cut a nice long piece of yarn, enough to give you a few rows of weaving but not too long that they have trouble threading it through and it gets in a knot (between around 30-40cm) Believe me this can happen!
Slide the needle under the first thread and then back up over the next thread and so on.
Once you have finished the first row using this technique, pull it through all the way leaving a couple of cm’s, either tuck this back over and then underneath the next two threads or tie a knot to the first warp thread (Once you have completed a few rows the yarn won’t come out and you can tape it down later on the back.)
Once you have finished your first row go back the other way doing the opposite over and under technique. Keep going with the yarn until you don’t have enough left for another row, making sure you leave about 2 cm at the end.
Handy tips…
- I like to wrap the yarn back all the way around the last thread and then it is a little neater and more secure. It might look a bit messy at this point but it will all be neat and tidy once you take it off the loom.
- To make sure there are no gaps in the weft^ you can use a fork to push it together or your fingers.
- Do not pull the yarn too much when you start a new row otherwise it will cinch in the middle and look uneven at the sides.
^ What is a weft? The yarn that is inserted over and under the warp threads.
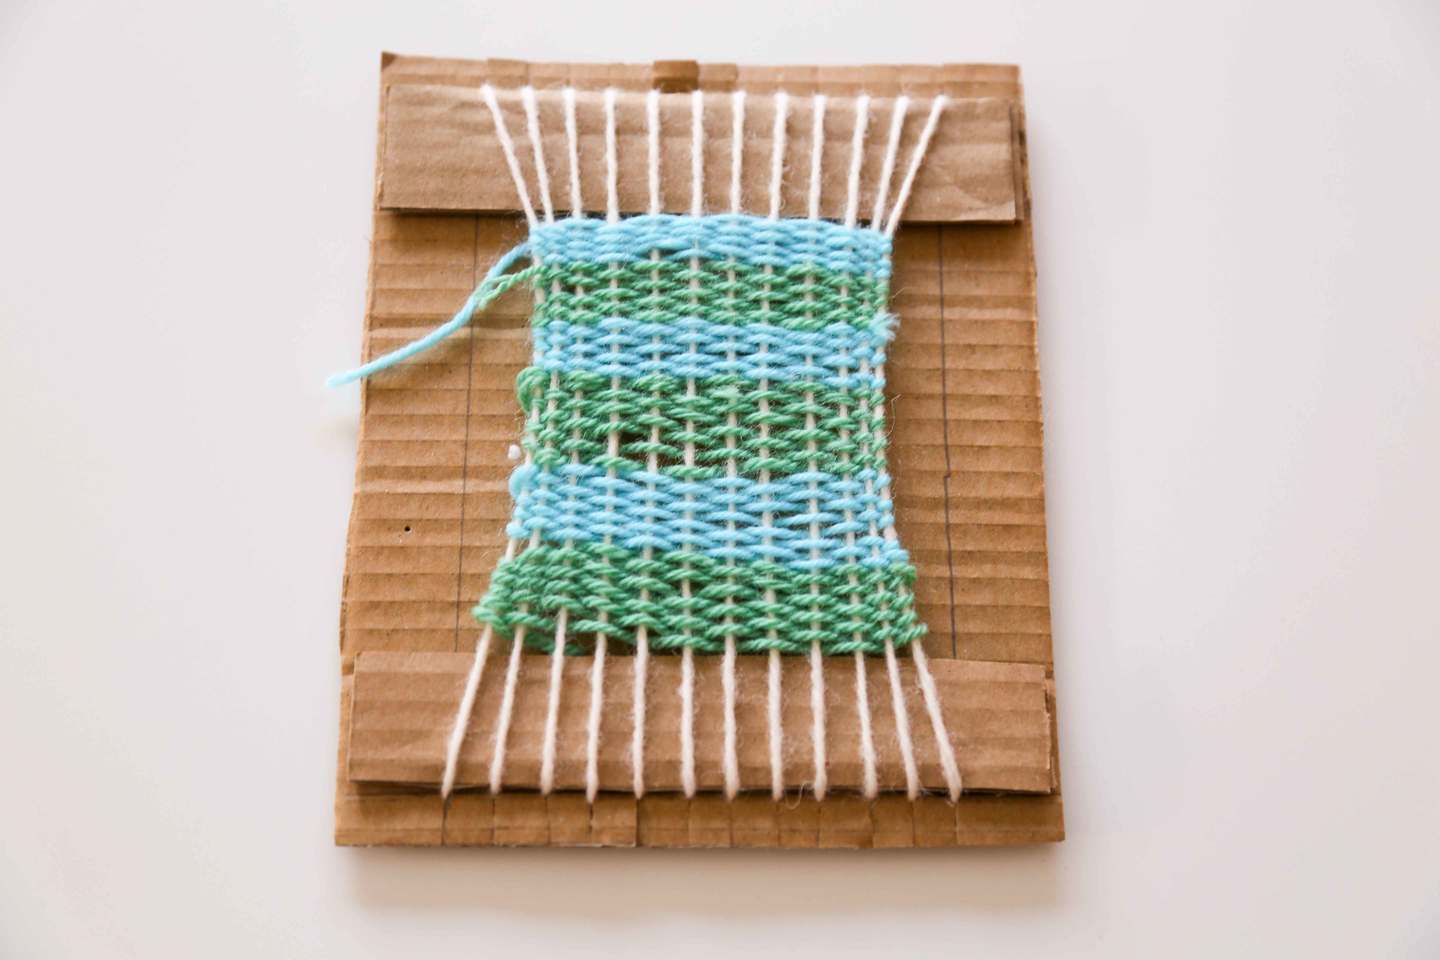 The finished weave on the loom
2. Once you get to the very end, cut the yarn leaving a 3 cm tail.
3. Undo the tape at the back and take off the loom. You have to be careful here as the weft threads can come off easily. Once off the loom, tie knots at both ends. So, for example, I tied threads 1 and 2 together, 3 and 4 and so on. You will end up with 6 tied knots at the top and bottom. See picture.
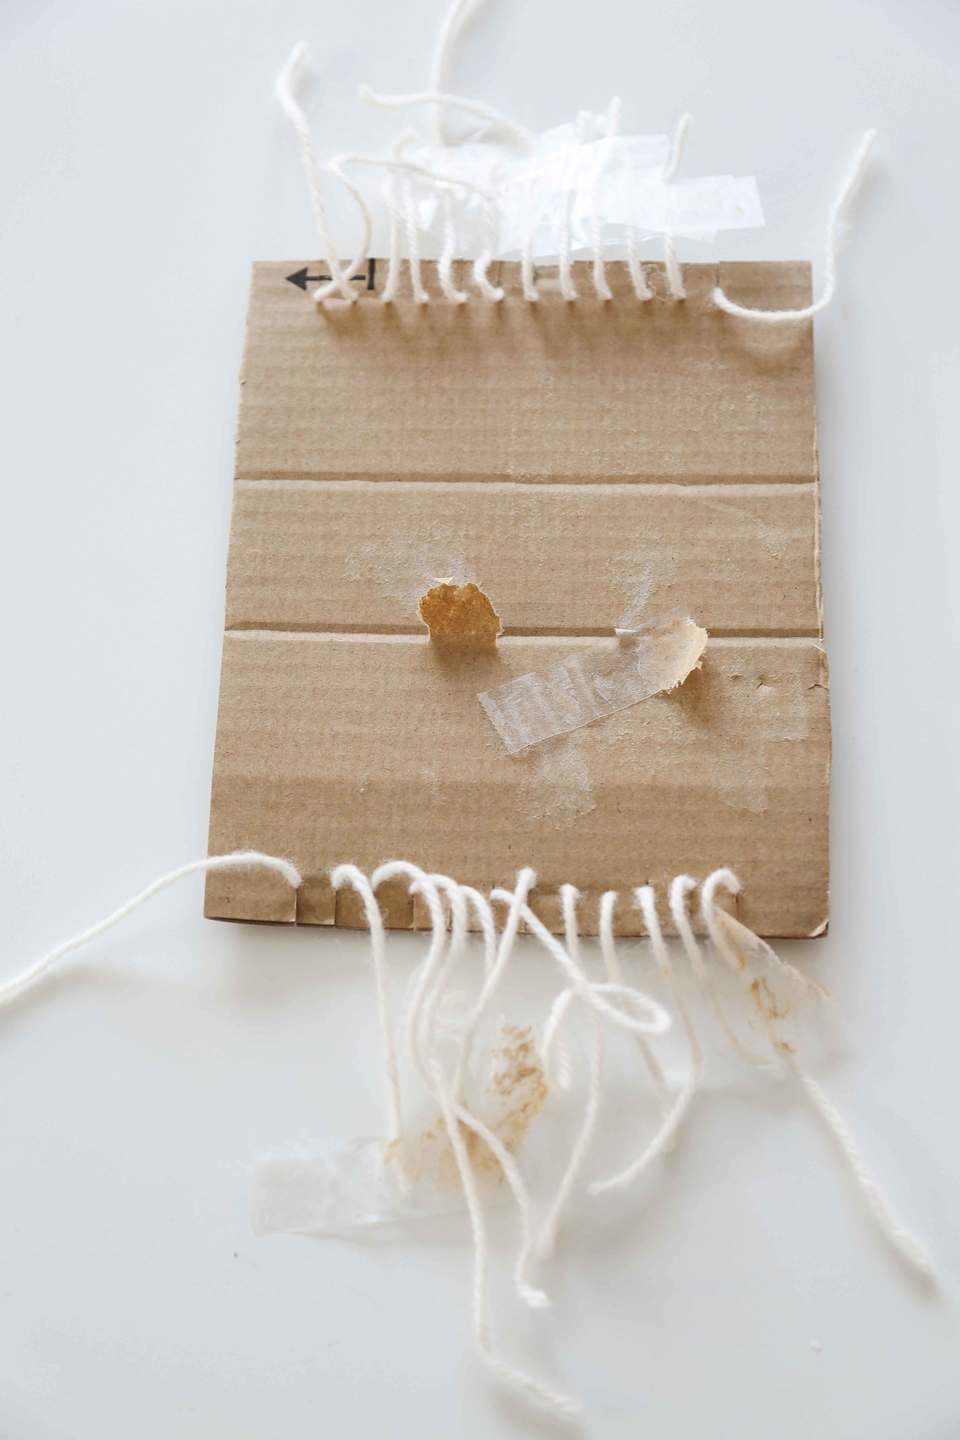 3. Undo tape at the back
 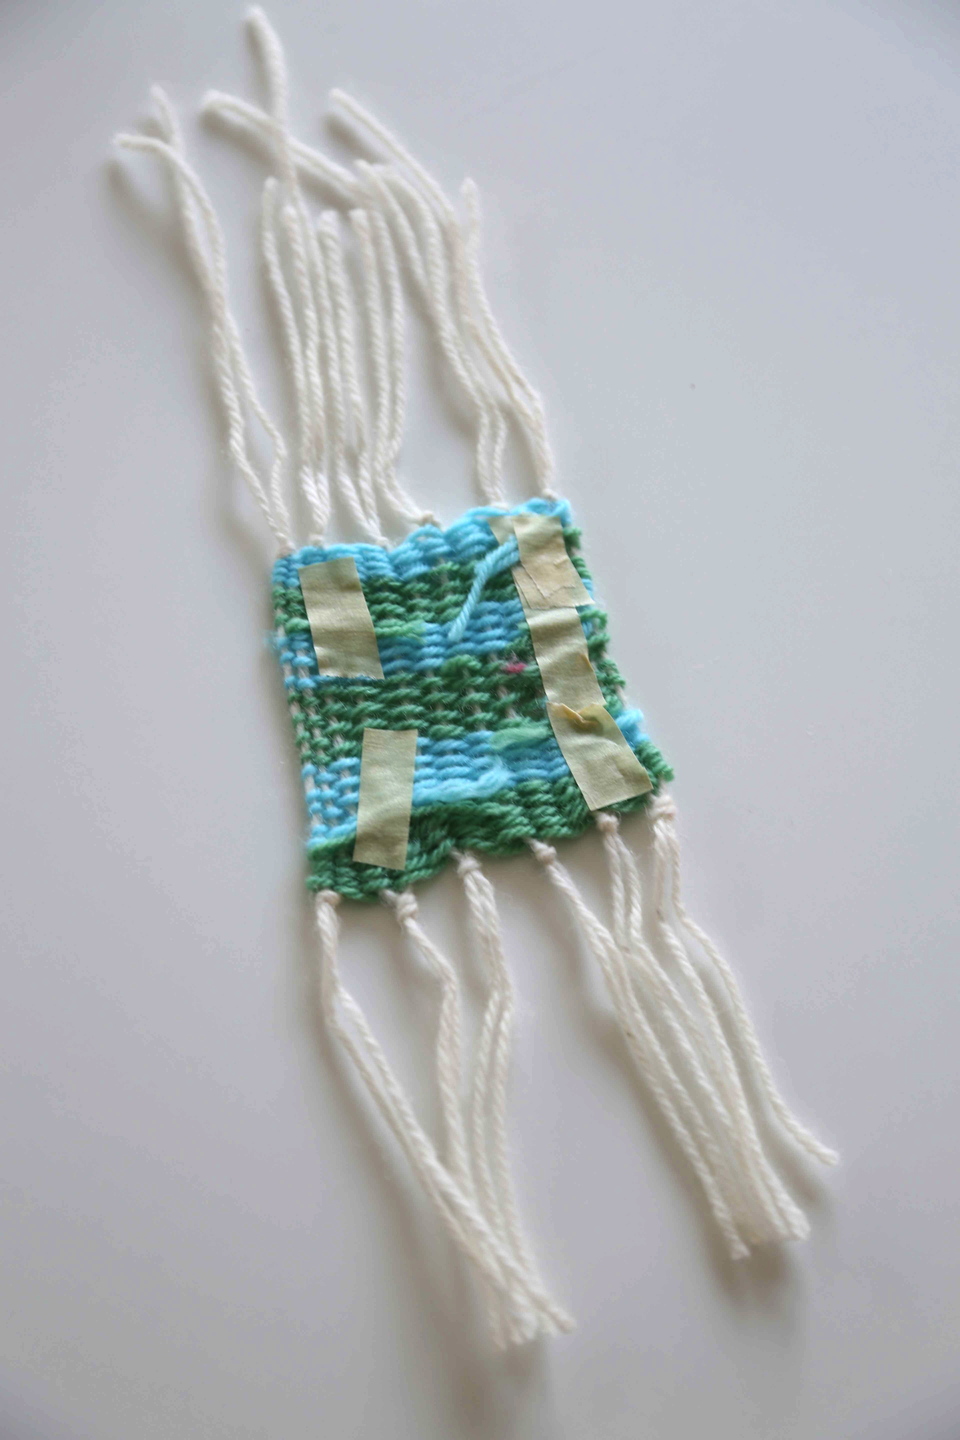 3. When the knots are tied
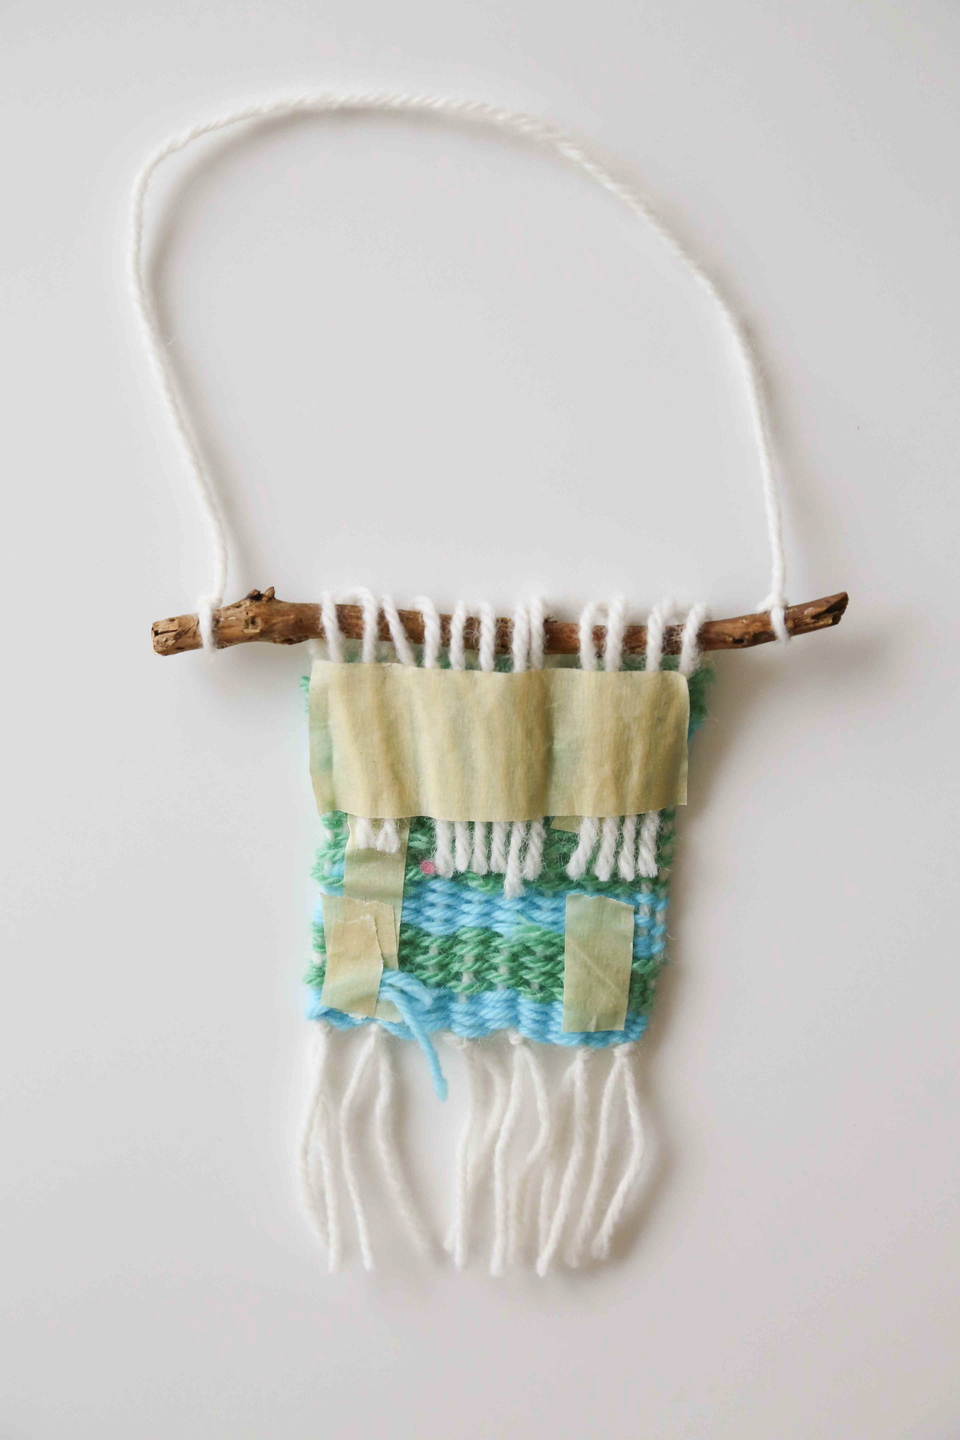
4. Flip the weave over and secure the extra yarn that you have there, you can thread these little bits back through the yarn but I think it is easier for the child to just tape it. You might need to trim them first before you tape them down.
We wanted to hang the weaves on a stick, so we found some in our garden. Make sure you find one long enough to allow a couple of inches either side of the weave.
The next bit is very simple…
5. Just fold the knotted warp threads at the top over the stick, so the threads go around it. Turn over and use masking tape to tape the ends of the threads down onto the back of the weave so it is secured.
6. To hang, cut a piece of yarn around 50 cm and tie to one side of the stick and then to the other.
 5. Tape over the twig
You now have an amazing new decoration, and created a rewarding and fun memory with your little ones.
What I have also learned is that it is far harder and more time-consuming to try and explain something like this in writing than it is to actually do it!
If in doubt follow the pictures and enjoy!
Blogger and photographer: Clare Keylock
Follow Clare’s beautiful work on Facebook and Instagram
